DIY Christmas Wreaths
Nov 27, 2020
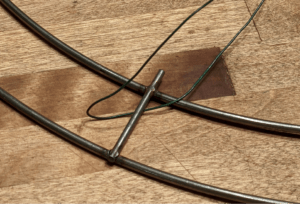
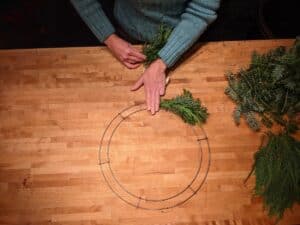
- Unwind approximately 12” of wire from the spool; leaving a 3” tail, form the wire into a u-shape. Hook that u-shape under one of the rings of the wreath form and twist the ends together, tightly attaching the wire to the frame. DO NOT cut the wire!
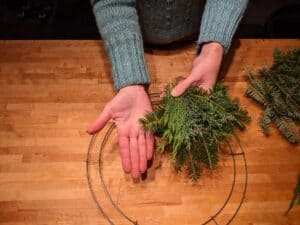
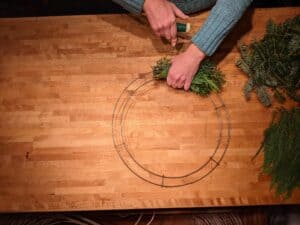
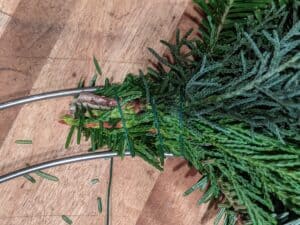
- Make your first bundle of greenery. Using approximately 8 pieces of greenery, make a small bouquet slightly larger than your hand, keeping all the cut ends lined up and even. For a consistent look, use the same quantity of each green in every bundle, and keep your bundles the same size!
- Place the first bundle on your wreath ring where you attached the wire; the wire should be approximately 2” from the cut end of your bundle (the bottom). Wrap the wire around the bundle tightly 4-6 times as you move the wire spool toward the bottom of the bundle; you should end up with the wire at the bottom of the bundle. I find, as a right-hander, I prefer to have the top of my bundles facing to the left, so my left hand holds the bundle down while my right hand works the wire. Periodically check that you are wiring tight enough by tugging gently on pieces of greenery to ensure that they are secured.
- Make your 2nd bundle, using the same method described in step 2. From the bottom of the first bundle that is attached to the wreath ring, measure out a distance of 3 fingers, and place the bottom of your second bundle there, laying the top of bundle two on top of bundle one. Tightly wrap the lower 2” of this new bundle tightly with wire, 4-6 times, down to the bottom of the bundle.
- Repeat around the wreath until you reach your first bundle.
- Rotate your wreath 180 degrees until the top of the first bundle is now facing toward your dominant hand (if you’ve been adding your bundles to the side of the wreath closest to you, you will rotate it so that it is now farthest from you.) Holding a bundle, slide your non-dominant hand under the first bundle and place it on the ring; wrap tightly with wire, being careful not to grab any of the greenery from the first bundle. Repeat with the final bundle.

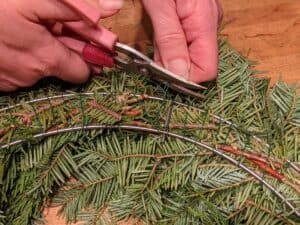
- Cut the wire, leaving a tail of approximately 3”. If you can find the starting wire, you can twist these together and tuck it into the wreath; otherwise, wrap the wire a few times around one leg of the ring then tuck it into the wreath.
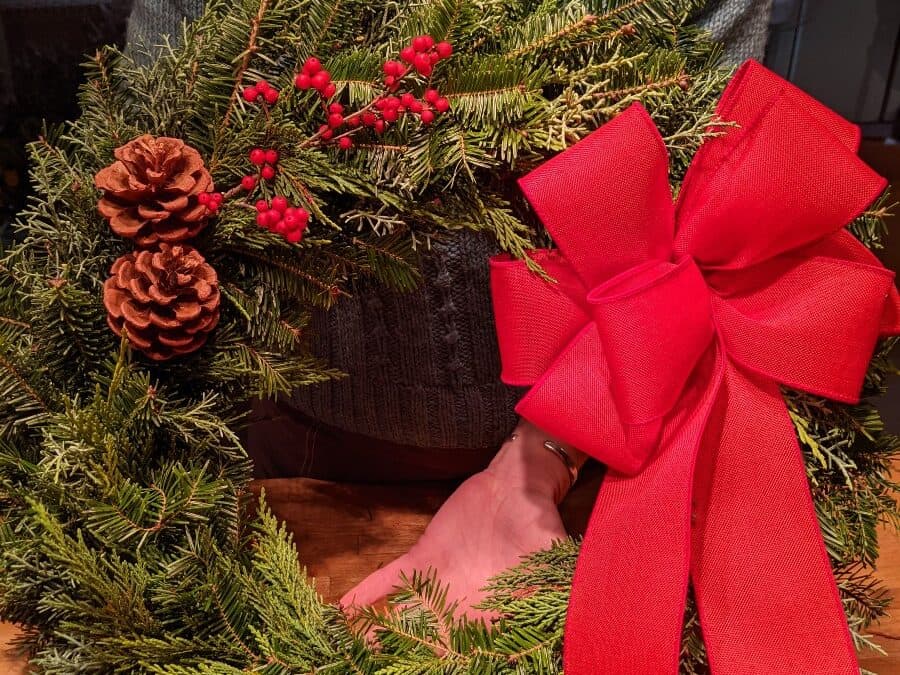
- Stand back and admire your skill! Decide which side is “up” and where your ribbon/bow will be placed. Add that now by wiring it directly onto the wreath, being careful to avoid catching too much greenery under the wire.
- Add your decorative elements. For cones, fruit slices, and cinnamon sticks that have wires attached, locate the desired position on the wreath and wrap the wires tightly but discreetly around the wreath without constricting the greenery. For berries, twigs, and other dried materials, attach a wired wooden pick to each stem or bundle and insert into the wreaths, with your materials facing in the same direction as the greenery.


- Hang your wreath in a protected area outside where all your neighbors can admire it 😊